What is FiveMinChat?
FiveMinChat is an AI-powered chatbot that lives on your website, answers visitor questions automatically, and collects contact information - all trained on your own content.
Upload your documents or point it at your website - it learns from your actual content.
One line of code on your website. Works with WordPress, Shopify, Wix, or any site.
When a visitor shares their name, phone, or email - you get an instant email notification.
See how many messages your bot has handled and manage everything from one place.
Creating Your Account
Signing up takes less than 2 minutes. You'll set up your account and configure your AI bot in one go.
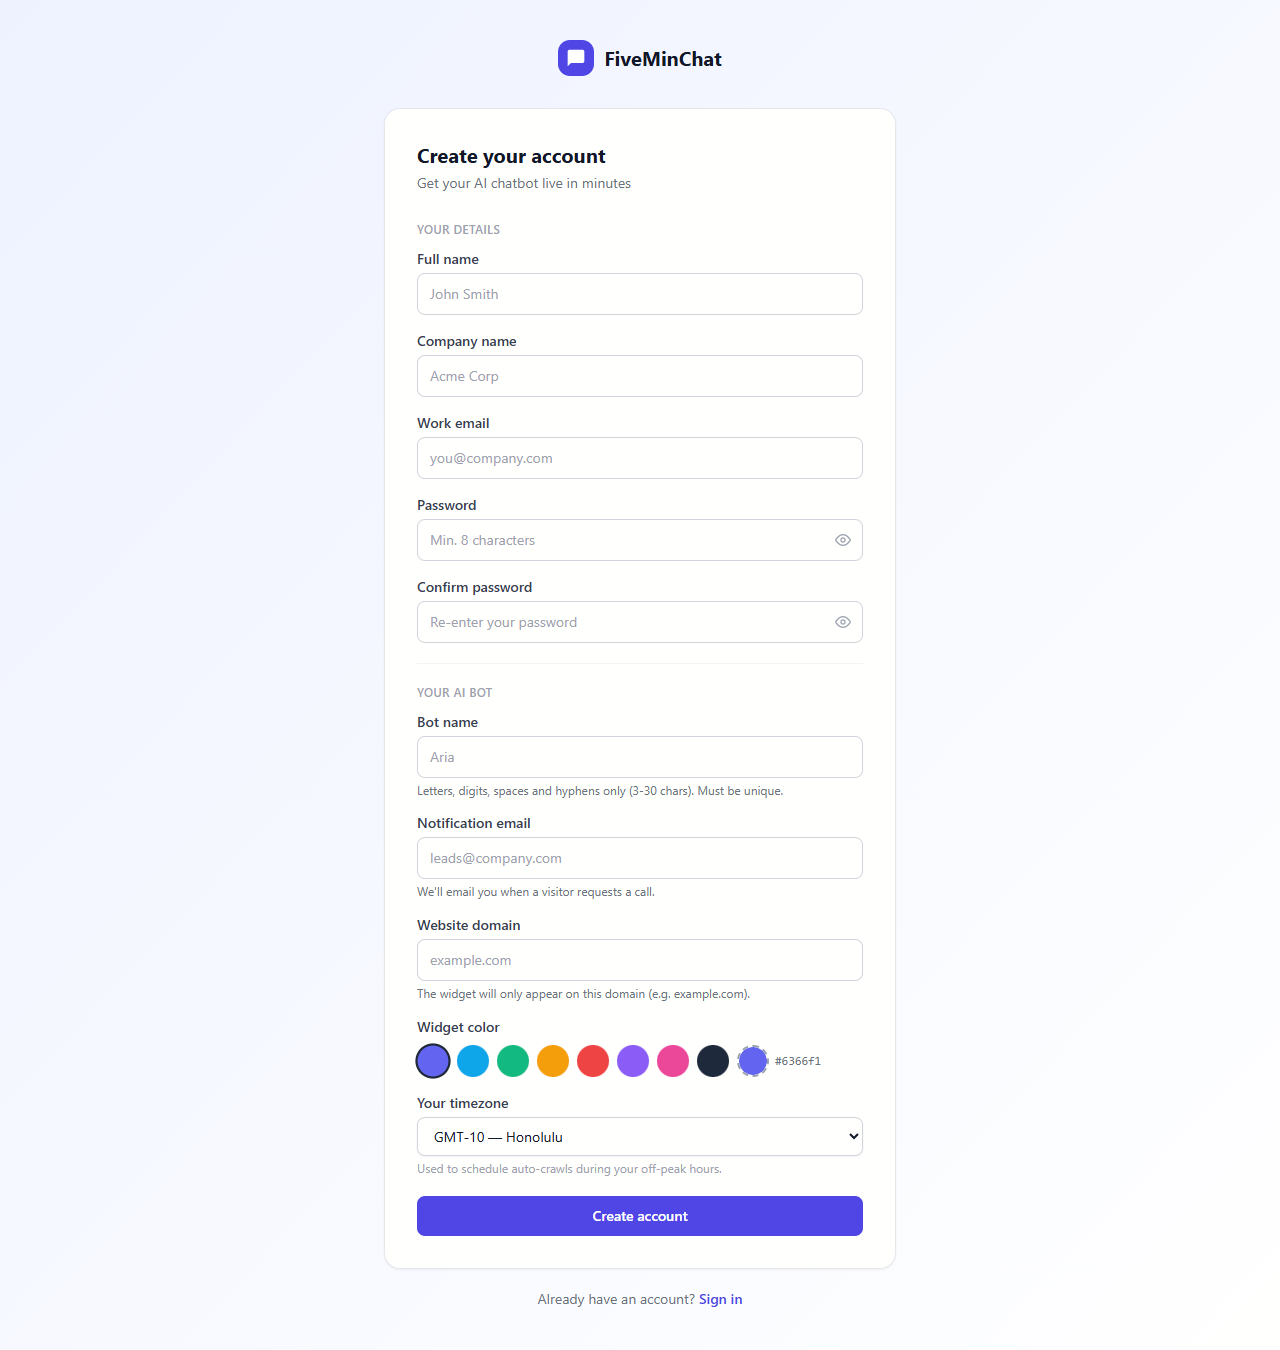
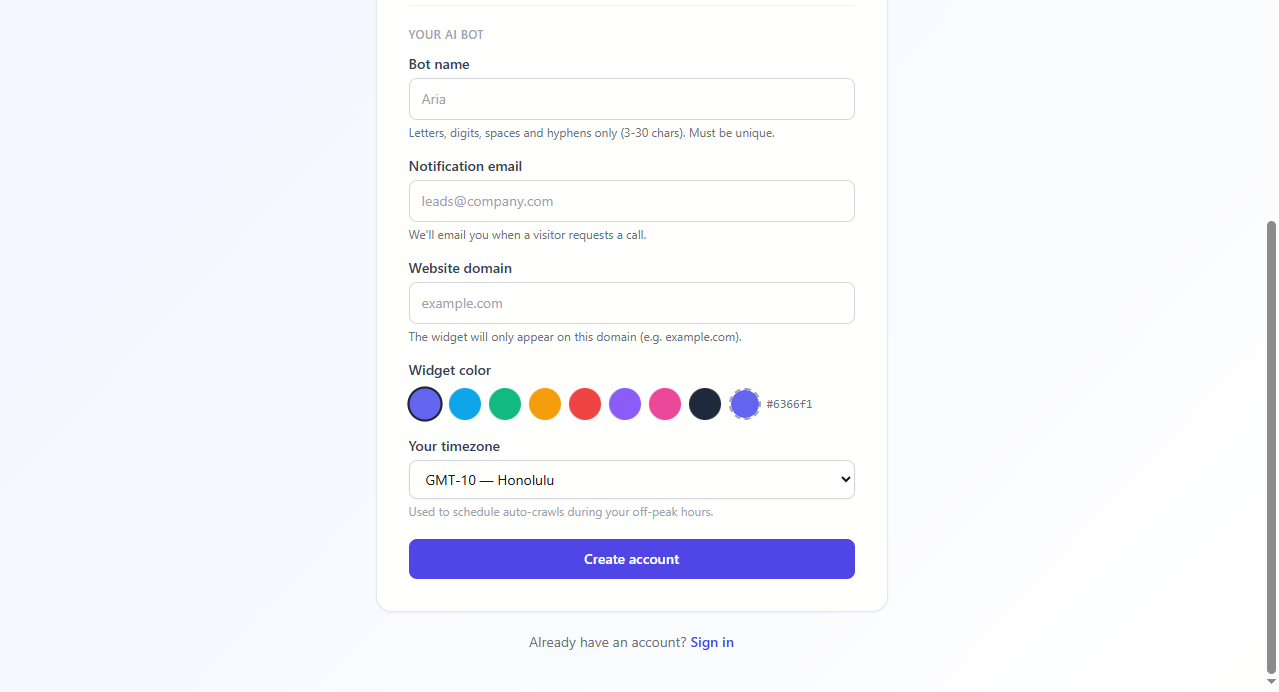
This is where you name and configure your chatbot:
- Bot name - What the chatbot will be called (e.g. Aria, Max, your business name). Keep it friendly.
- Notification email - Where we send alerts when a visitor leaves their contact info. Can be the same as your sign-up email.
- Website domain - Your website address (e.g.
example.com). The widget will only appear on this domain. - Widget colour - Pick a colour that matches your brand.
- Timezone - Used to schedule automated website crawls during your off-peak hours.
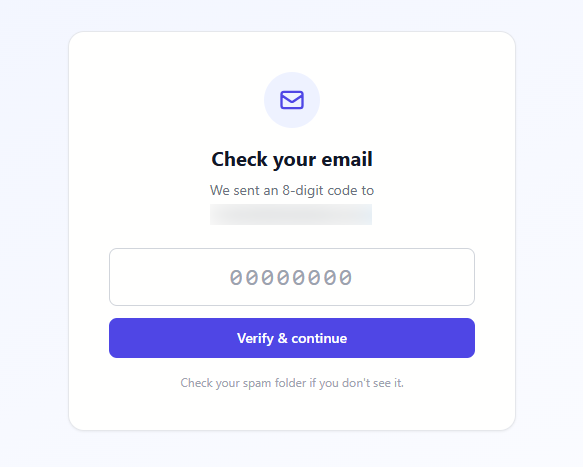
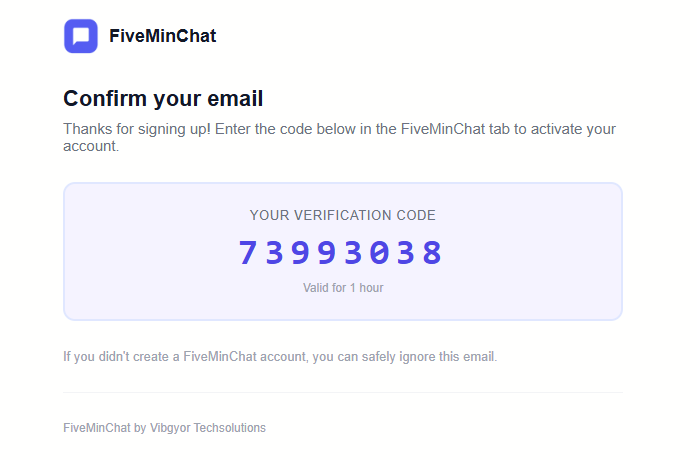
Confirming Your Email
After clicking "Create account", FiveMinChat sends an 8-digit verification code to your email. You enter this code directly in the app - no link to click, no page redirect.
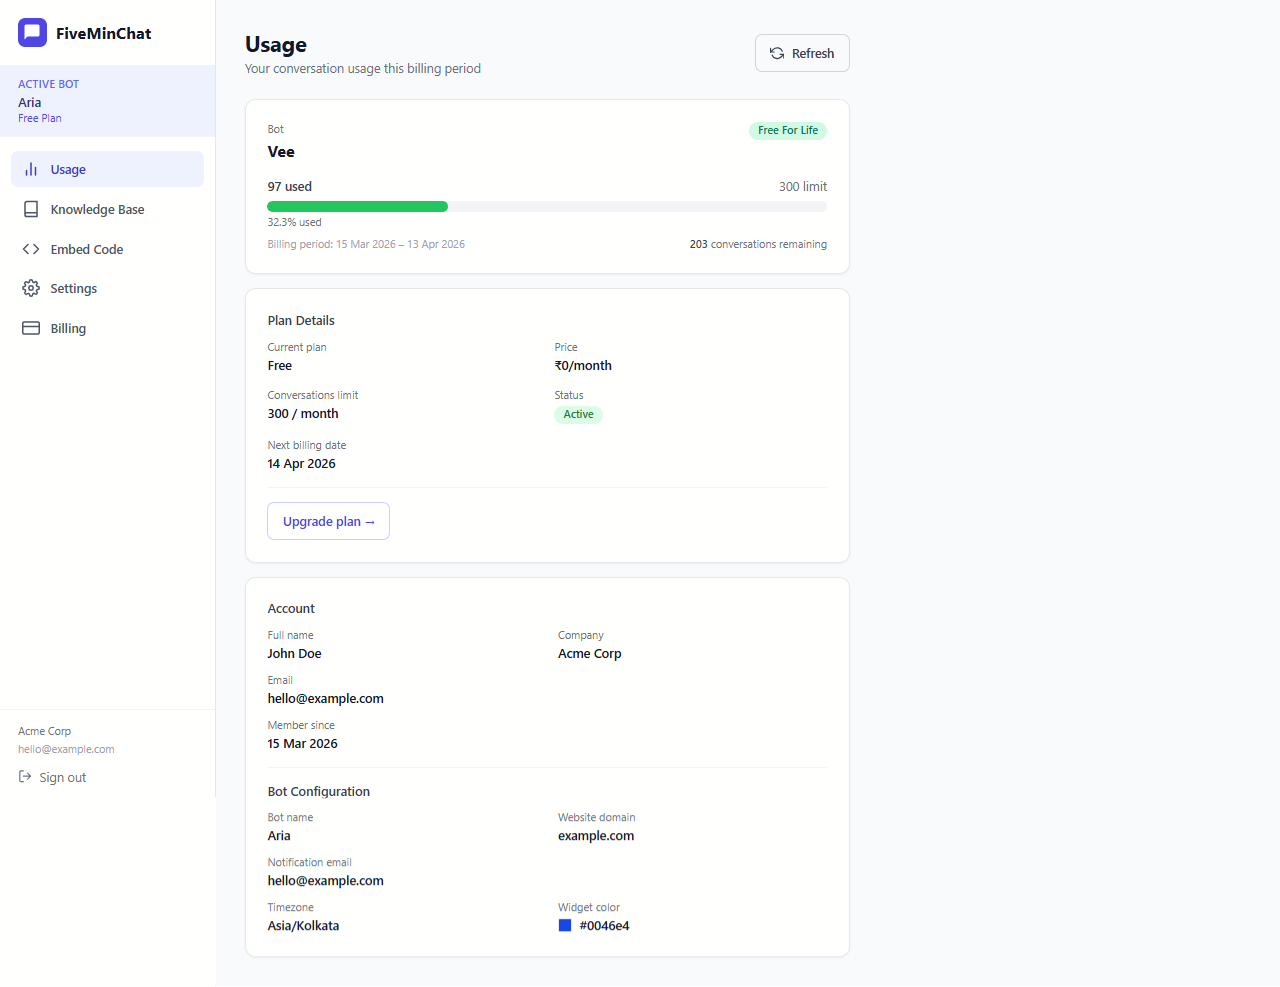
Dashboard Overview
Your dashboard is where you manage everything - training your bot, checking usage, getting your embed code, and adjusting settings.
Sidebar Navigation
On the left side you'll see the navigation menu:
See how many messages your bot has handled this month vs your plan limit.
Train your bot - crawl your website or upload documents here.
Change your bot's name, colour, greeting message, and system prompt.
View your current plan and upgrade when you're ready.
Get the one-line code snippet to add the chatbot to your website.
Knowledge Base
This is the brain of your chatbot. Whatever you add here is what the bot uses to answer questions. You have two ways to train it: crawl your website automatically, or upload documents manually.
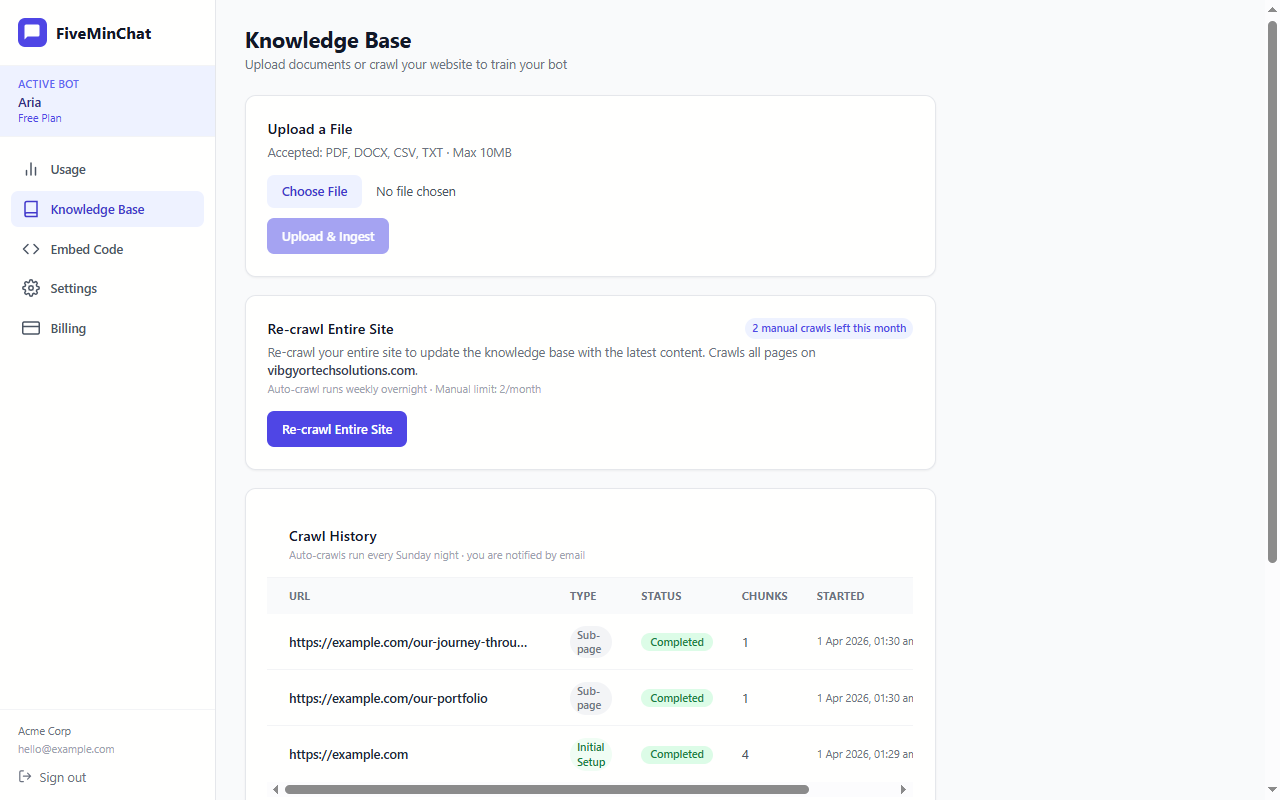
What you'll see on this page
- Crawl Website tab - Enter your website URL and the bot will automatically read all your pages.
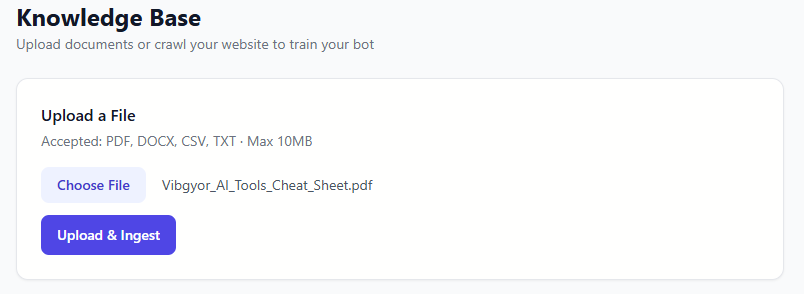
- Upload Files tab - Upload PDF or Word documents directly.
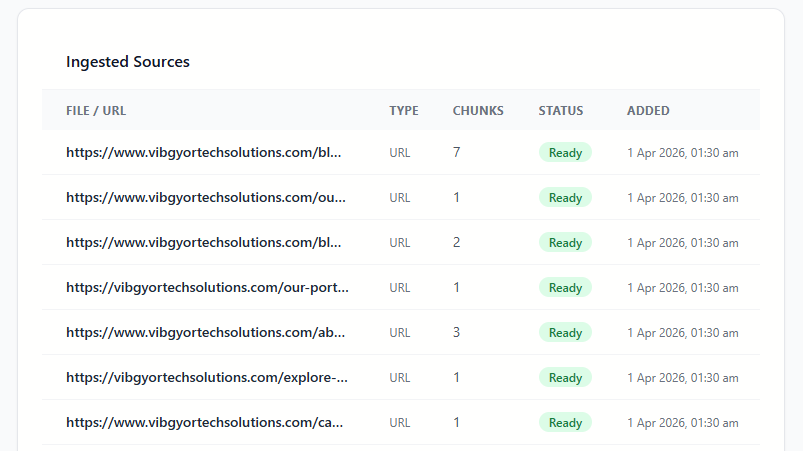
- Ingested Sources list - Shows every page or file your bot has already learned from, including the status and number of text chunks processed.
Bot Settings
Customise how your chatbot looks and behaves from the Settings page.
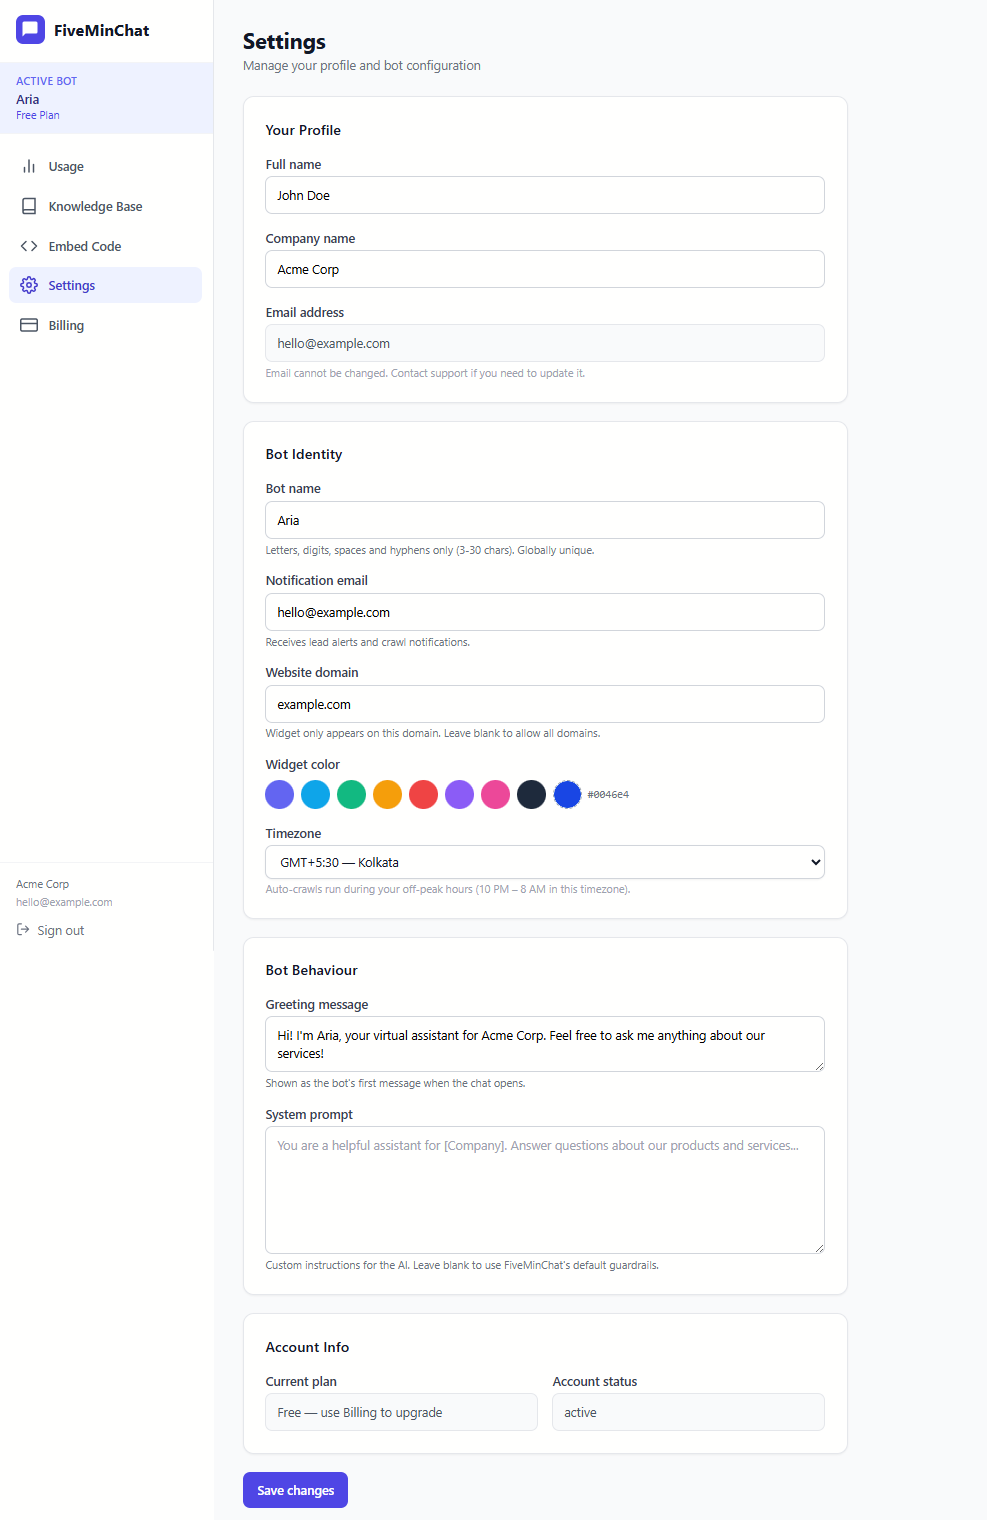
What you can change
| Setting | What it does |
|---|---|
| Bot name | The name shown in the chat window header (e.g. "Aria") |
| Widget colour | The colour of the chat button and header - match your brand |
| Greeting message | The first message visitors see when they open the chat (e.g. "Hi! How can I help you today?") |
| Notification email | Where lead alerts get sent when a visitor shares their contact info |
| Website domain | The bot only appears on this domain - keeps it off other sites |
| Timezone | Used to schedule automatic website re-crawls at night when traffic is low |
| System prompt | Give the bot permanent background knowledge and instructions - critical for facts your website may not state clearly (address, phone, hours, policies) |
System Prompt - Your Bot's Permanent Knowledge
Web crawlers read page text - but many websites embed their address, phone number, and opening hours inside images, maps, or JavaScript widgets that crawlers cannot read. Even if the information is in plain text, it may be buried in a footer that gets skipped. The result: a visitor asks "Where are you located?" and the bot says it doesn't know - even though the answer is on your homepage.
The fix is simple: paste that information directly into the System Prompt. Whatever you write there is always available to the bot, regardless of what was or wasn't crawled from your site.
What to put in the System Prompt
Think of the System Prompt as a private briefing note that the bot reads before every conversation. Anything you write here is always taken into account. Include facts that are important but may not be reliably crawled from your website:
- Business address - full street address including city, state, and PIN/ZIP
- Phone number(s) - include the country code and specify which is sales vs. support
- Email address(es) - e.g. sales@yourcompany.com, support@yourcompany.com
- Opening hours - including holidays, lunch breaks, and different hours per day
- WhatsApp or chat link - if visitors should contact you via WhatsApp
- Response time promise - e.g. "we reply to all emails within 4 hours on business days"
- Key policies - return/refund policy, shipping timeframes, warranty terms
- Things the bot must never say - e.g. never quote prices, never discuss competitors
- Tone and language - e.g. "always reply in formal English" or "respond in Hindi if the visitor writes in Hindi"
Example system prompt
Here is a sample you can adapt for your business:

Usage & Limits
The Usage page shows you how many messages your bot has handled this billing cycle, and how close you are to your plan's limit.
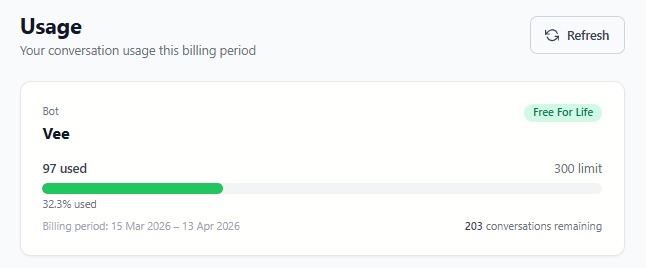
What counts as a "message"?
Each message a visitor sends to your bot counts as one message. If a visitor sends 5 messages in one chat session, that counts as 5 messages.
What happens when the limit is reached?
When you hit your monthly limit, the chat widget is automatically hidden from your website - visitors won't see the chat button until your limit resets at the start of your next billing cycle. You can upgrade your plan at any time to immediately restore access.
Embed Code
The Embed Code page gives you the one-line snippet of code that adds your chatbot to your website.
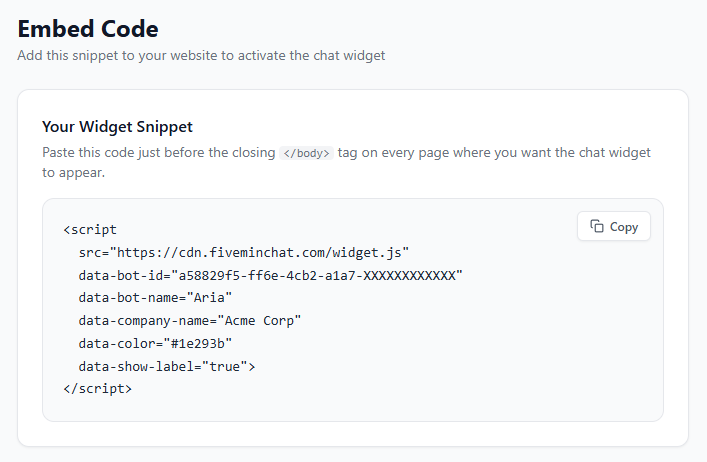
Your embed snippet looks like this:
Copy this code by clicking the Copy button. Then paste it into your website - instructions for WordPress and other platforms are in the sections below.
</body> tag on every page where you want the chat widget to appear - usually that means site-wide in your theme's footer.Crawling Your Website
This is the easiest way to train your bot. FiveMinChat visits every page on your website and reads the content - just like a real person would.
example.com). Click the Ingest My Entire Website button - FiveMinChat will automatically crawl all pages on your site.
Crawl History
Below the upload section you'll find a Crawl History panel. This shows a log of every time your website has been crawled, including automatic scheduled crawls. The auto-crawl frequency depends on your plan: Starter runs once a month, Growth runs twice a month, and Pro runs once a week. All auto-crawls happen overnight during low-traffic hours based on your configured timezone.
Uploading Documents
Have important information in a PDF brochure, price list, or Word document? Upload it directly and your bot will learn from it.
Supported file types
| Format | Extension | Notes |
|---|---|---|
.pdf | Most common - works great for brochures, menus, manuals | |
| Word Document | .docx | Microsoft Word files |
| Excel Spreadsheet | .xlsx | Product lists, price tables, data exports |
| CSV | .csv | Comma-separated data files - good for large datasets or product catalogues |
| Plain Text | .txt | Simple text files, FAQs, notes |
Checking Ingest Status
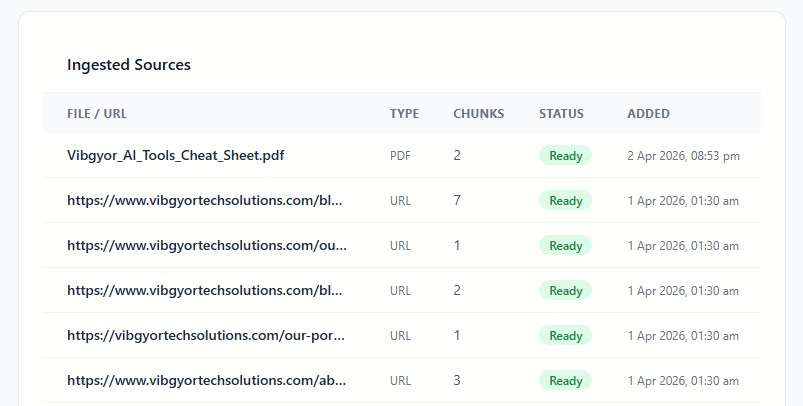
The Ingested Sources list at the bottom of the Knowledge Base page shows you everything your bot has learned from.

Understanding the status badges
| Status | What it means | Action needed? |
|---|---|---|
| Processing | Your bot is currently reading and learning from this content | Wait 30–60 seconds and refresh |
| Ready | Your bot has fully learned from this page or file | None - all good ✅ |
| Failed | The page couldn't be read (usually login-protected pages or server errors) | No action needed for password-protected pages; contact support for others |
What are "chunks"?
The Chunks column shows how many text segments were extracted from each source. A chunk is roughly 300 words (around 2,000 characters) of text. More chunks = more content your bot can reference. A page with 0 chunks typically means it had very little readable text (e.g. mostly images).
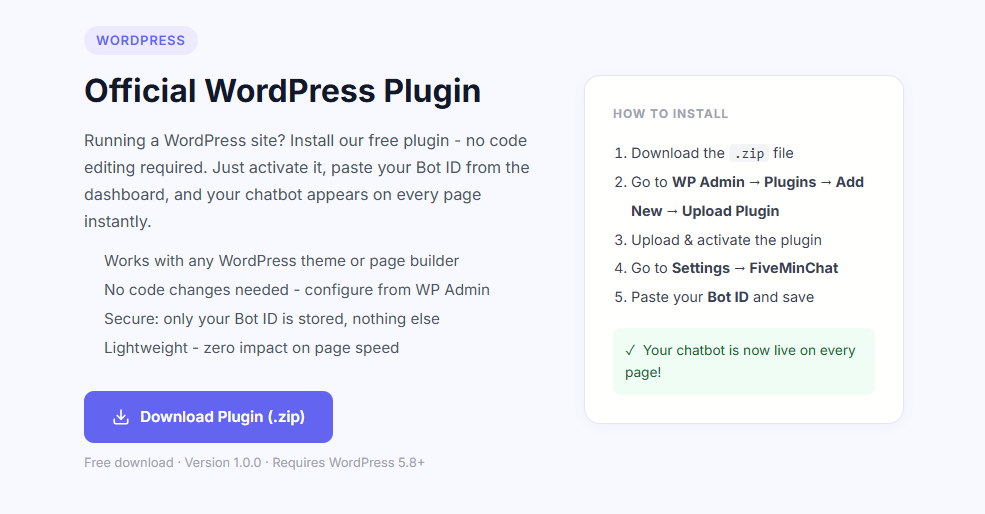
WordPress Plugin
If your website runs on WordPress, installing FiveMinChat is easiest using our plugin - no code editing required.
Step 1 - Download the plugin
fiveminchat.zip will download to your computer.
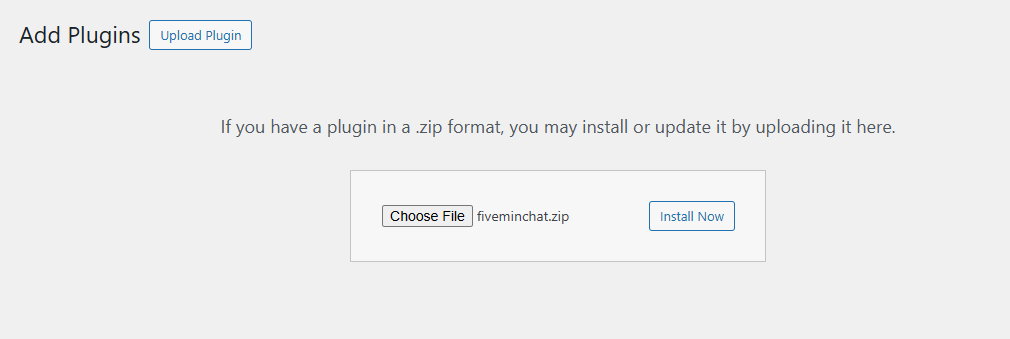
Step 2 - Install the plugin in WordPress
yourwebsite.com/wp-admin and log in with your WordPress credentials.

fiveminchat.zip file you downloaded, then click Install Now.
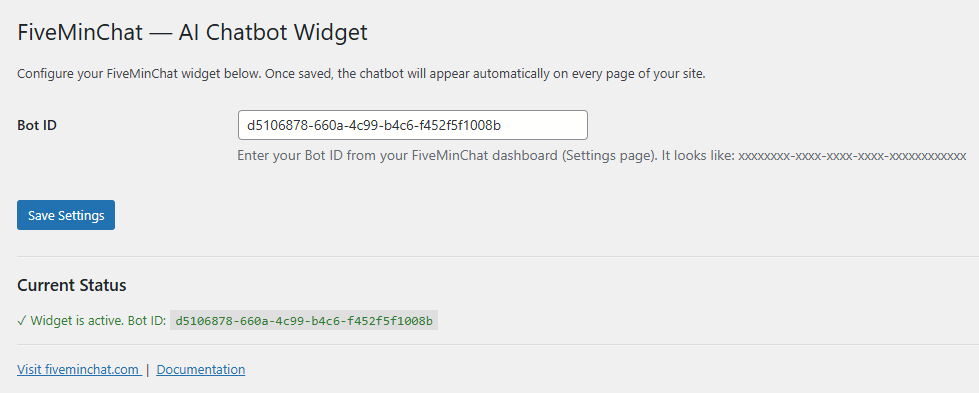
Step 3 - Add your Bot ID
d5106878-660a-4c99-b4c6-f452f5f1008b). Copy it.
Other Websites (Non-WordPress)
FiveMinChat works on any website - Shopify, Wix, Webflow, Squarespace, or a custom-coded site. You just paste one line of code.
Copy your embed code
Go to Embed Code in your dashboard and copy the full script tag. It looks like this:
Where to paste it
Paste this code just before the closing </body> tag on every page. Most website builders have a "Custom Code" or "Footer Scripts" section in their settings. Here's where to find it on popular platforms:
| Platform | Where to add the code |
|---|---|
| Shopify | Online Store → Themes → Edit Code → theme.liquid → before </body> |
| Wix | Settings → Custom Code → Add Code → Body - End |
| Webflow | Project Settings → Custom Code → Footer Code |
| Squarespace | Settings → Advanced → Code Injection → Footer |
| Custom HTML | Paste directly before </body> in every HTML file |
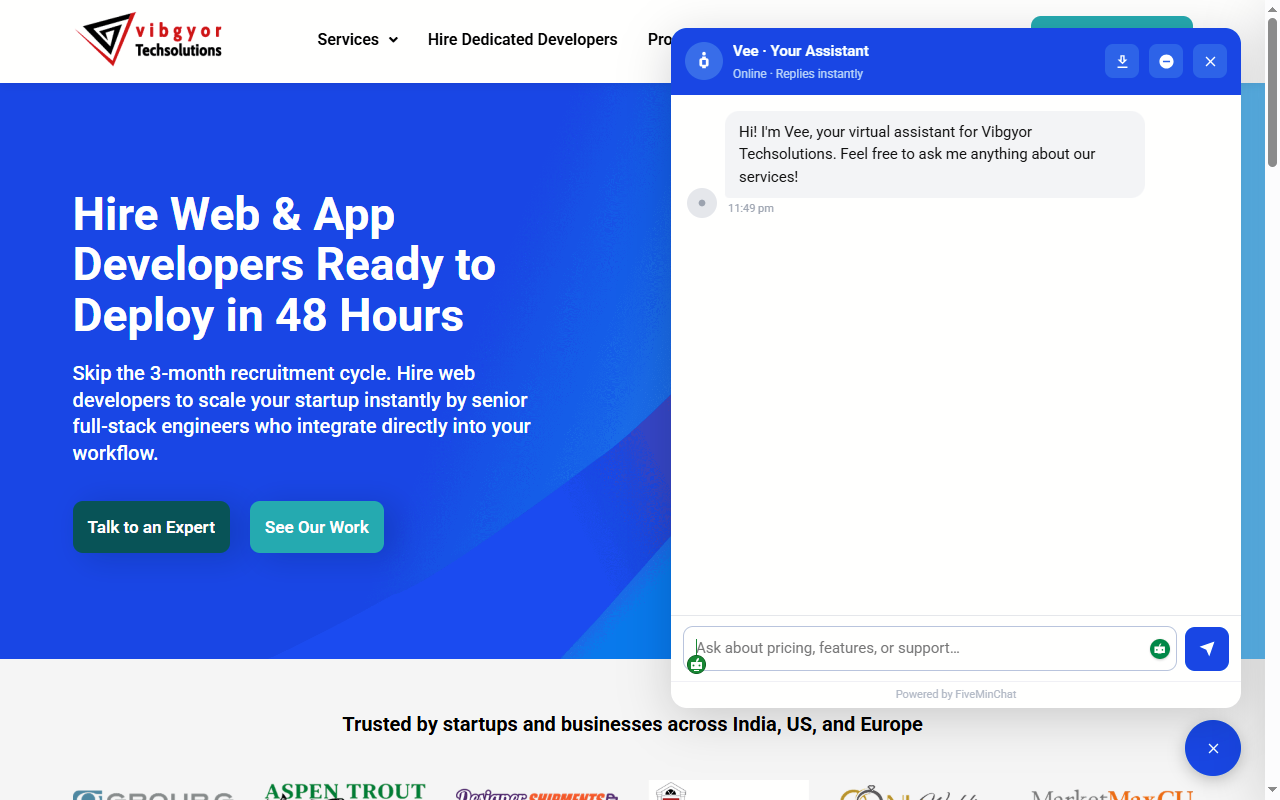
Testing Your Bot
Before sharing your site with visitors, take a minute to test your bot yourself.
- The embed code / plugin is properly installed
- The domain in your Settings matches exactly (e.g.
example.comnotwww.example.com) - Your 7-day trial is still active (check the Usage page)
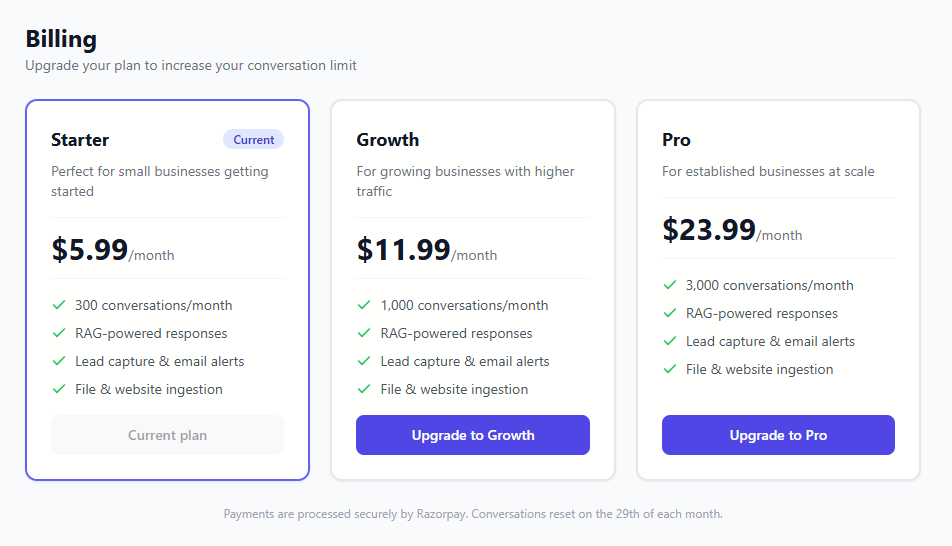
Plan Comparison
All plans include full access to every feature. The limits below are the only differences between plans.
| Plan | Messages/month | Website pages | Files | File size | Manual crawls/month | Auto-crawl | Message history | Price (INR) | Price (USD) |
|---|---|---|---|---|---|---|---|---|---|
| Trial | 1,000 | 25 | 5 | 5 MB | 2 | Monthly | 30 days | Free for 7 days | |
| Starter | 1,000 | 25 | 5 | 5 MB | 2 | Monthly | 30 days | ₹499/month | $5.99/month |
| Growth | 5,000 | 100 | 20 | 10 MB | 5 | Twice a month | 90 days | ₹999/month | $11.99/month |
| Pro | 15,000 | 500 | Unlimited | 25 MB | 10 | Weekly | 1 year | ₹1,999/month | $23.99/month |
Understanding the limits
- Messages/month - Every message a visitor sends counts as one message. The counter resets on your billing date each month.
- Website pages - Maximum number of pages crawled from your website in a single crawl.
- Manual crawls/month - How many times you can manually trigger a website re-crawl from the Knowledge Base page. Resets every 30 days.
- Auto-crawl - How often FiveMinChat automatically re-crawls your site in the background without any action from you.
- Message history - How long message history is kept before being automatically archived. Older messages are securely backed up before removal.
How to upgrade
Frequently Asked Questions
Can the bot remember what a visitor said earlier in the conversation?
Yes — the bot maintains full context throughout a conversation. It remembers everything said in the current session (up to the last 10 messages), so visitors can refer back naturally — e.g. “tell me more about that last option” or “what was the price you mentioned?” Each time a visitor opens a new browser session, the conversation starts fresh.
Can I have more than one bot?
Each account comes with one bot. If you need multiple bots (e.g. for different websites), contact us at hello@fiveminchat.com.
Will the chatbot slow down my website?
No. The widget loads asynchronously - meaning your website loads first, and the chatbot loads in the background. It has no measurable impact on page speed.
What languages does it support?
FiveMinChat's AI can understand and respond in most major languages, including Hindi, Spanish, French, Arabic, and many others. For best results, your knowledge base content should be in the same language your visitors will use. If you want the bot to respond in a specific language or switch languages based on visitor input, add that instruction to your System Prompt in Settings.
How often does the bot re-learn from my website automatically?
Auto-crawl frequency depends on your plan. Starter crawls once a month, Growth crawls twice a month, and Pro crawls once a week. All automatic crawls run overnight in your configured timezone so they don't interfere with normal traffic. You can always trigger a manual re-crawl at any time from the Knowledge Base page, subject to your monthly manual crawl allowance.
How many times can I manually re-crawl my website each month?
The number of manual crawls you can trigger each month depends on your plan: Starter gets 2, Growth gets 5, and Pro gets 10. This counter resets every 30 days. Automatic background crawls do not count against this limit.
How long is message history kept?
Message history is retained based on your plan: Starter and Trial keep the last 30 days, Growth keeps 90 days, and Pro keeps a full year. Before any messages are removed, they are securely backed up on our servers. This retention window only applies to the in-dashboard view - your visitors are not affected in any way.
What is the maximum file size I can upload?
The file size limit depends on your plan. Starter allows files up to 5 MB, Growth up to 10 MB, and Pro up to 25 MB. If you have a large document that exceeds your limit, try splitting it into smaller files or extracting the most relevant sections before uploading.
What happens to my data?
Your website content and uploaded documents are stored securely and used only to power your chatbot. We don't share your data with other customers or third parties. See our Privacy Policy for full details.
My bot is giving wrong answers - what should I do?
The bot can only answer from the content it has been trained on. If it gives wrong answers, try:
- Re-crawling your website to pick up any recent changes
- Uploading a specific FAQ document with the correct answers
- Adding instructions to the System Prompt in Settings (e.g. "Always recommend calling us for pricing questions")
Still need help?
Email us at hello@fiveminchat.com and we'll get back to you within one business day.